TRIPLE VICTORIA SANDWICH MINION CAKE!

INGREDIENTS
please note that this is per cake so depending on how many you want you will need to increase by that amount!
3 eggs then the same weight of:
castor sugar
butter (I used the new stork with butter)
self raising flour
1 tspn baking powder
2 tbsp milk
flavouring (i used real real vanilla extract, then lemon rind and lemon juice and in cake 3 i used banana flavouring)
optional – colouring i used yellow for the middle and top sponges
for the butter cream: for every 2 oz butter use 1½ cups icing sugar and 1tbsp milk!
- Preheat the oven 180ºC or fan oven 170ºC and grease and line the bottom of two 21cm tins.
- Weigh the eggs, without shells (I usually pop a jug on the scales, reset it to 0 then crack the eggs into that, without breaking the yolks) That way you will get a fluffy, even bake.
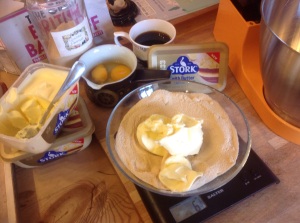
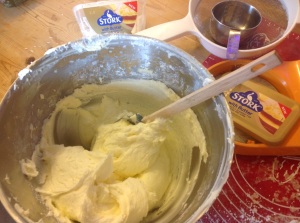
- Cream the butter and sugar together – you can do this the old fashioned way if you like, but dicky hands being what they are I prefer my trusty old Kenwood! Once light and fluffy, add a spoon of flour and beat in the eggs, one(ish) at a time. Then add in the flour, baking powder, milk and whatever flavour you are using.
- Put an even amount into each tin and bake for approx. 25 mins until well risen and fluffy and light. Leave for 5 mins in the tin to cool, take out of the tins and allow cool fully on a rack. Sandwich together with buttercream.
- For the Minion you will need at least 3 cakes, my bottom layer was vanilla with chocolate buttercream, middle was lemon with lemon curd and vanilla buttercream and the 3rd layer i made one 21 cm cake then the other half of the mix in a special hemisphere pan (only other way I know of to get a prefect ’rounded’ cake is to do it in a pyrex style dish but that doesn’t give a good even bake every time; you will need to allow extra time for the hemisphere pan too.)
- make sufficient buttercream for in-between all 6 ‘cakes’ and also to lightly coat them on the outside as glue for your fondant icing to adhere to. Then, make your Minion! I coloured shop bought fondant paste blue and yellow, flavoured the yellow with a tiny bit of banana and took it from there!


Okay, so i know this is only a short ‘bake’ and there is not a great deal about putting together the 3 tiers to make the Minion, but, I really wouldn’t recommend a novice make this cake , and i don’t wanna teach any more advanced bakers to suck eggs. However, should you want more information please do feel free to message me. I did google the best way to make the shoes and found a great youtube video by Veena Azmanov that shows how to make baby bootees from a ball of paste rather than having to cut out a template, which i felt would be a better boot for the minion, I used black sugar paste for this and put in half a teaspoon of tylose powder to stiffen them up. I did this with a small ball of the blue and yellow sugar fondant too, to use for the arms and legs, so that they would not be soft and floppy once on the cake. I also put some modelling wire in the arms to give double protection and phew, they stayed on for 2 whole days! I did ‘cheat’ for the eyes though, i bought a stiff card mask but i think over all the effect was none to shabby. And my own personal favourite bit of the cake, nice set of buns on the back, teehee!
Finally, being as this was the final of Great British Bake Off 2015, its a teeny bit late to take part this year; but make sure you earmark is to join in with the blog for 2016. Its a huge thank you to Jenny Paulin for setting up and hosting this blog off and also thanks to Clare Anderson for hosting this final blog for the GBBO!

BAKE NUMBER TWO – NOT-SO TRADITIONAL COFFEE AND WALNUT CAKE

3 eggs then the same weight of:
castor sugar
butter (I used the new stork with butter for this)
self raising flour
1 tspn baking powder
2 hot water
1 tspn instant coffee
small handful of walnuts finely chopped
1 cup granulated sugar
1/3 cup water
2oz soft butter (i used the new stork butter for this)
1½ cups of icing sugar
½ tspn instant coffee dissolved in 1 tbspn hot water
handful of walnuts and some chocolate coffee beans
METHOD:
- So, it’s quite simply another sponge cake made by the creaming method. I find it best to do this in my mixer (i have silly hands that don’t take kindly to beating butter). So Oven on at 180ºC and grease and line the bottom of two 21 – 23 cm cake tins. Dissolve the coffee in the water.
- Weigh you eggs as before in a jug then weigh out all the other ingredients accordingly.
- Cream the butter and sugar together. Once light and fluffy, add a spoonful of flour and beat in the eggs, one(ish) at a time. Then beat in the flour, baking powder and coffee. Finally stir in the chopped walnuts (optional).
- Put an even amount into each tin and bake for approx. 25 mins until well risen and fluffy and light. Leave for 5 mins in the tin to cool, take out of the tins and allow cool fully on a rack.
- Make your toffee nut brittle. Put sugar and water into a heavy based saucepan and heat on a medium heat, without stirring, until all the sugar is dissolved watch for the sugar turning to a mid caramel colour. Meanwhile, line a baking sheet with a piece of parchment paper and sprinkle liberally with a handful of walnuts. Once the sugar has begun changing colour pour it over the nuts and leave to set solid.
- Make coffee butter cream simply by blending together the butter, icing sugar (sieved) and coffee.
 Put approx. ¼ of the buttercream onto the top of the top cake and smooth it out to as neat a circle as you can, leaving the edge free. Put the rest in a piping bag. Pipe some ‘roses’ around the edge of the top cake and then pipe the rest on the top of the cake which will be the bottom layer. Pop the top one onto the top! The decorate your roses with some ½ walnuts and/or chocolate coffee beans. Break the nut brittle into shards and arrange them ‘artistically’ in the centre of your buttercream circle!
 - Eat copious amounts of this cake with buckets of coffee!

I don’t know whether it was my baking or the new stork with butter added, but i won a local cake competition with this one (yay for me!); honestly though, i can’t say that i really noticed any major difference with the cake, compared to how it normally turns out with my usual brand of baking butter, but the butter cream oh my, that was so much tastier than normal. It was lighter, fluffier and much paler too (i consider this a plus when putting colour into butter cream) and as luck would have it, it was on special offer (half price) in the supermarket last week, so i bought 6 for the freezer, and will use it from now on for making butter cream with.
TIPS – For a ‘flat’ top to your creamed cakes, I do 2 things. Make a slight indent into the mixture right in the centre of your tin with the back of a spoon and i use strips of old towel, liberally soaked in water, wrapped around the outside of the cake tin. This will insulate the outside of the tin, allowing the middle of the mix to cook at the same tie as the outside, plus it will also induce a small amount of steam into the oven which can only assist with the rise.
So, i will eventually get around to doing some tutorials for cake making over this winter – i am new to blogging but an old hand at the baking; so, if in the meantime you want to know some tips and techniques, any help or advise on building your own Tim Minion (or any other cake for that matter) then please leave me a message and i will help or point you in the right direction.

Your minion looks great. I tried to do a standing up minion for my sons birthday last year so I know how tricky it can be! X
LikeLike
That minion is unreal!! I know my kids would die for it!! WOW!
LikeLike
Thanks Hazel, I have to say I was really pleased with the overall finish 😳
LikeLike
I am LOVING the Minion cake! It looks brilliant and I’m sure it tasted yummy too!
LikeLike
your Minion cake is amazing!!! my boys would love to have that at their birthdays! Love the cheeky bottom shot lol
your coffee and walnut cake looks great too – those shards of walnut toffee brittle is a great idea to top your cake with
thank you so much for all of your hard work this season and for linking up xx
and good luck x
LikeLike
That is amazing, my daughter would love it. What a great finale cake x
LikeLike